
Showing posts with label projects. Show all posts

Monday, April 9, 2012

Going where few paints have gone before

There are lots of reasons being an adult is great. One of my favorite things is that you can do things that kids want to do, but aren't allowed to. Like eat cookies for dinner, or paint on furniture. I have done both in the last month or two. Want to guess which one I did last week? Here's a hint. The first picture is what our living room looked like 9 days ago. This is what our living room looked like two hours ago.

Notice anything different? If you guessed "the fireplace is turned off," you're only partially right. (If you thought "they should really be better about folding their throw blankets," well, yes. That too.) BUT... the point is, there was a pink chair and now it's blue and NO I have not begun my long-talked-about foray into furniture upholstery.

After some testing, then getting fed up about the process taking too long, I decided to paint the chair. With paint. House paint. Behr house paint, because I had some midnight blue lying around. I toyed with an assortment of options, viewed here:

These options included acrylic paint, permanent marker (I briefly entertained the idea of buying out Office Max's whole supply of blue Sharpies), and a combination of polyester and cotton dyes. I landed on a watery mixture of Behr Midnight Dream and fabric or textile medium.

I soaked the chair and did two coats of paint, really working the paint into the fabric with a brush. The first two coats took three hours each. Here's with one coat, looking plummy:
And with the second coat... still a little blotchy.
The third coat was the charm. This I decided to sponge on, and it took about half as long as the other two coats. I just used a regular household sponge and got my hands very painty. Here's the before:
And after, back in its home:Now, to be clear, this chair was never going to win any awards for world's most comfy chair. And it's sure not going to win them now, with its new stiffer finish. But it's not that uncomfortable, and whatever loss of comfort suffered is well worth the coinciding loss of pinkness. Maybe someday I'll change the upholstery to something less stuffy than the sort-of flame print/texture. In the meantime, I'm feeling quite pleased with this little experiment.

Soon to come, a reupholstered YELLOW ottoman to infuse some much-needed color into the room. This and my largest shot at modern art to date (a 3' by 4' faux Rothko for over the fireplace) make up my weekend plans, and I am pretty jazzed about it!

P.S. Don't you love the rug? Hit a sale and used a coupon at World Market and got a great deal on that. Hopefully the ivory won't make me too neurotic.

Saturday, February 4, 2012

Of things to come

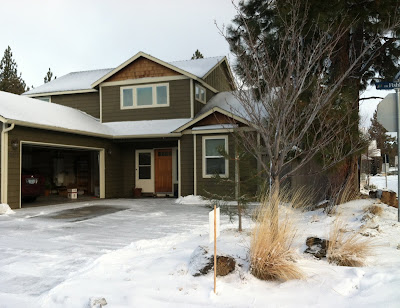
We've been out of our apartment and completely in our house for almost two weeks now. Naturally, we moved during Central Oregon's ONLY snowstorm so far this season. Bone-dry weather bookended the four days we spent moving. Those four days featured tons of snow that plugged the storm drains, rain that flooded the streets and "fell" horizontally because of the crazy wind, iced-over roads and very chilly temps.
Have to get rid of that storm door soon...I am worried the HOA is going to yell at us for leaving it open all the time.

But we're all moved in now and it feels like we've been there all along. I have been developing plans and plotting with the fervor of a mad scientist. It has been absolutely beyond fantastic. Especially after I discovered this free furniture plans website and nearly lost my mind with giddiness. I am going to build SO MANY THINGS it's ridiculous.

I've also starting purchasing my anniversary present: an assortment of tools. (Happy 5 years, Todd! Our anniversary was in December.) Last weekend, I picked out a sliding chop saw and a small air compressor with a nail/staple gun. Pictures to come soon. Especially action shots.

This weekend, we're in Medford to pick up some of the rest of our stuff and furniture. In preparation for this, I bought a hitch cargo tray (which I have been thinking of and referring to as my "mini trailer") and intend to bring A LOT of stuff back to Bend using it. It's pretty big: it extends two feet behind my car and is five feet wide. Plenty of space for my wing chairs. I hope. We shall see.

I can't wait to post pictures of what the place looks like partially furnished and what I'm going to be up to. This house is going to be a wonderful thing.

Thursday, August 4, 2011

New addition

It was a bit iffy whether the now-yellow dresser was going to come back to Bend with us, but I ended up doing it. The paint, for some inexplicable reason, was still kind of gummy, despite having had three weeks to dry and harden in 85+ degree temperatures. Consequently, the finish ended up a bit crappy, after getting jostled around in the back of the Q.

(And the "reveal" pic is craptacular, thanks to the impromptu hailstorm we had while I was taking pictures. It's much cuter in person. Whatever.)

But I'm overall very pleased with how it came out, mainly because of one little secret ingredient: Floetrol. It's a paint conditioner. It extends the wet edge and helps reduce drag. It's like pouring magic into your paint. Somehow, without diluting the color (which is good, because yellow is a sucky color to paint with and requires a lot of coats) it makes painting worlds better. I highly recommend you snag a bottle for your next project. I will never paint without it again.

The dresser takes up a bit more space at the top of the stairs than I'd expected, but it's ok.

It also doesn't particularly matter, because we're thinking we'll be changing places in Bend soon. We're kicking around the idea of buying something that's the exact opposite of our Hillcrest house...NOT a short sale or foreclosure, NOT with a yard that wants maintenance, NOT a fixer-upper, and probably more like 1500 square feet or less. Or renting something bigger. In any case, our 600-sq-ft studio days are numbered. And the dresser will have a new home.

Friday, July 22, 2011

Time flies

Been a busy few months around here...but before things got busy (more on that shortly) I finally painted the stupid wooden knobs that came with the dresser I painted last winter. I used some antique gold paint and am happy enough with how they came out (and really loving actually having knobs on the dresser--makes getting the drawers out a lot easier).

Fun trick with painting knobs (I've done it several times and this is my best method). Get a box, like a cracker box, and cut X-shaped holes in it. Put the screws in the back of the knobs and insert the knobs, screw-side down, into the box, so the knobs are sitting on the box. Then you can easily paint the knobs without holding them and getting your fingers all paint-y. And they're nice and stable, so you can easily paint all the way around.

In other news, I started working at Todd's company about six weeks ago. Not the direction I expected life to take, but a good opportunity came along and I decided to take it.
Anyway... We're headed back to Medford next weekend, and I'm in the process of painting another dresser there. This one's for Todd, since he's been living out of laundry baskets and under-the-bed boxes since we moved here.

Several months ago, he ranted, "I used to be a man! I used to store my clothes in a dresser!" So I'm painting the champagne-colored one that was in the guest room a school bus yellow color, filling the holes and adding new nickel hardware. It gets to come home with us next weekend :)

That's mostly what's going on here these days!

Saturday, May 7, 2011

BE SPRING!

It's springtime in Medford. I posted about it in our house blog a few weeks ago. It is NOT spring in Bend. Spring has dementia: it was late, then showed up for a few days, but not realizing it was in the right place, left. And now it's November again.

Anyway, not to be deterred, I constructed a self-watering vegetable container based on this plan and planted tomatoes, basil and oregano. I also built a nifty little cart to wheel it in and out at night, because tomatoes are temperature sensitive and won't produce if they get too chilly.

That's the plant collection, taken from 20 feet above looking over our ledge. The pot on the right is 18 inches at the top. It's big. (It also probably needs a reservoir fill-up, too, eek...)

Other crafty news: I found a blog post somewhere about a lemon wreath. I love wreaths that don't look like trash, and I love lemons, and I especially love being crafty and creative. So...I copied the idea. But mine's better.
Or, you know, it will be, once I finish hot-gluing the lemons in place and can hang it up. Still maybe a bit sparse in the 6 to 9 o'clock areas. Hmm.

ALSO! I am propagating rosemary and basil, and my little seedlings (Gloriosa daisies, which look like black-eyed susans, my favorite!) are coming right along.

Oh, I love gardening so much.

Thursday, April 7, 2011

How to knock off a J. Crew headwrap

Ok...here's the headwrap how-to and an example that I made!
  1. Use your seam ripper or scissors to remove all the thread that holds the tie together: remove the tags, backing and any trim stuff. The idea is to turn it into a flat piece of fabric.
  2. Once all the thread is removed, iron the wide part of the tie so it's flat. Iron and flatten to where the tie gets skinny and remains skinny; leave that alone.

Saturday, April 2, 2011

Watch out, J. Crew

Three summers ago, J. Crew made an amazing accessory known as the no-fuss headwrap. I bought a few and wear them all the time. I always wish they'd made more...more colors, more fabrics...

But the thing is, I've always known they're incredibly simple to make. If, you know, you can sew. (Which I now can!) So last weekend I rounded up a bunch of fabric I'd bought for this purpose (including a men's silk tie from Goodwill for experimentation purposes) and got to work studying the construction of the headwrap.

It's really simple. The basic idea is a 16" x 8" rectangle (for the top part) and a 2"x 8" rectangle (for the tube that holds the elastic around the back). I have to double-check my measurements, but I'm thinking I'll post a how-to when I make my next one. The first was sort of an exploratory mission.
Some of my stitching was very nice and neat.
Some...wasn't (in the middle...that's the messy part. Not the hem). Silk is kind of tricky and my sewing machine doesn't really like elastic much. Anyway....stay tuned for a how-to in the coming days. I'm excited to have a huge supply of headwraps.

P.S. SUPERCUTE tie, huh? $3 from Goodwill. Totally weird for a man's necktie, but LOVE for the headband.

Thursday, March 31, 2011

Dropcloth euroshams

I was inspired a few weeks ago by this post in one of my favorite blogs, about using dropcloths as curtain liners. I've been wanting to sew eurosham covers for these big square pillows we use as a sort of headboard on our bed for a long time. It's part of the reason I got a sewing machine in the first place. But fabric is EXPENSIVE (or rather, I always end up picking the most expensive things. But upholstery fabric is pricey.)

So anyway, using dropcloths (the linen-y texture and oatmealish color of which I love) was a perfect solution. A perfect $10 solution.

A little help from Allie (Todd's coworker/my sewing buddy) and I was on my way. The first one took a long time to measure out, and I predictably got confused with the math and need to enlist a little velcro to help the backs stay shut. But on the whole, I am so happy with how they look, and feel TOTALLY accomplished for coming up with an idea, plotting it out and making it happen!
It's official: sewing is fun!

My pillows were 26" x 26" and I measured 28" for the big square and should have done about 15" x 28" and 14" x 28" for the backs. (Or even a little more. The backs fluff out in the middle, not that anyone sees. That's where I need a bit of velcro.)

There was only a small mess left in the kitchen after:
Heh.

Sunday, March 6, 2011

It's official, I love my sewing machine!

So, I got my sewing machine out for the first time since...the first time...and decided to work on taking in a military-style anorak i got last year, so it'd be ready to use for springtime. (Spring, please don't come too soon; I'm still enjoying the snow, boots, boot socks...gosh, I love winter.)

I pinned the jacket, threaded and "installed" a new bobbin, threaded the machine and sewed two simple lines on each side. SUCCESS! Then I cut off the extra, and the raw edge started to unravel. So I got out the manual and read about the overcasting stitch, which allows you to finish edges. Perfect. It called for presser foot G, so I read about how to change out the foot (easy!), did that, and overcasted that edge!

I then felt like this:
Except instead of sailing, I SEWED! AHOY! The end.

Thursday, December 9, 2010

Operation dresser: completed

After letting the dresser cure in the bathroom for a few days, this is how she came out:
The blue is more vibrant than than the picture would have you believe. I really like it, especially the part about how this...
is now this...Which is obviously much better. I got excited about the extra six square feet that getting rid of the didn't-fit-under-the-bed boxes freed up. That's a mark of someone who lives in close quarters.

Still in the market for hardware for the dresser. I like these Martha Stewart knobs a lot, but this was supposed to be a super-cheap project. At $3.50 each, they'll cost almost as much as the dresser did. Maybe they'll go on sale.
In any case, I'm loving this dresser. Even without knobs.

Monday, December 6, 2010

Addicted

So the saying goes, "you can take the ____ out of the ____, but you can't take the ___ out of the ___." For me, the fill-ins would be girl and project. I can't help the fact that I love Home Depot (more on this at some other point. I sing along with Home Depot commercials and inform Todd that More Saving and More Doing is the Power of the Home Depot, while he cringes, imagining astronomical AmEx bills and unfinished projects littering our miniscule living space.)
Then there's this other detail: my under-the-bed boxes don't fit under our queen-size bed. Todd's do, but mine sit next to the bed, which is making me crazy due to how ugly they are. Also, it is a bloody pain to live out of a box. So I started my hunt for a small dresser to fit into the narrow space we have for it. It took a few weeks of craigslisting and a drive to Redmond, but I came up with this little guy.
Of course, that kelly green had to go, but I had peacock blue plans for it from the beginning. The wall to the left in the picture above sticks out only eight inches, so this dresser, at 14 inches, is just perfect for the space.

I originally planned to spray paint it (in the bathroom, which was an ill-conceived idea from every angle I can think of) but decided to paint-paint it instead. (Still in the bathroom so it can stay ventilated and cure properly.)

Anyway, I have to put the second coat on one drawer and the frame today, but then it'll be finished!

I'm hoping to replace the hardware with something snappy at some point, but right now, I'm just really excited to have a dresser (and to have painted something peacock blue -- I've been wanting to do that for a while).

Update to follow on this. Bonus: it will give me one more surface to decorate for Christmas. Which will bring my grand total of Christmas-y spots in the house to two. Not enough, but better than one.